Description
Fast Frames Hat Add-On 152 x 140 mm
Fast Frames Hat Add-On hoops are a simple way to embroider on hats. Setup is very quick, with only two knobs to fasten.
Benefits:
- Hooping in 5 seconds.
- Relief from carpel tunnel
- Excellent repeatability
- Great for multi head operations
 |
 |
|
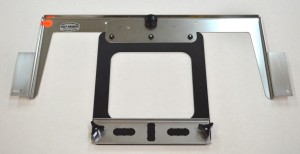
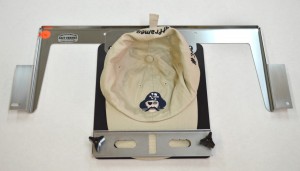
Single Frame Hat Hoop |
Fast Frames Hoop Add-On |
Hoops are available in two styles (pictured above): the first style (the Single Frame Hat Hoop) features a pre-assembled wing on each side allowing you to place it directly into your machine; the second style (the Hoop Add-On) is more in line with our regular windows allowing you to place the hoop onto a regular Fast Frames arm.
 |
 |
|
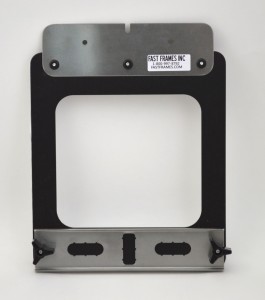
Rear Hat View |
Side Hat View |
These hoops have been designed with durability and simplicity in mind. They are very straightforward to use. With precision laser-cut straight edge and handy centering helpers you will be able to align your hats with ease. The large 5 ½” by 6” sew field ensures you will never run out of room to embroider.
General Instructions for using Fast Frames
- Lay backing under the frame. Cut backing slightly wider than the frame 1,5 cm all around. Using the frame as your gauge, your backing will fit the frame correctly each time.
- Turn the frame upside down. Peel the paper from the backing. Place the backing on the frame. Be sure to allow backing to extend past the sides and bottom of the frame. Fold the excess backing over the front edge of the frame.
- Attach the frame to the machine arms just as you would one of your hoops. The opening of the frame (with the backing attached) should be coming toward you. Trace your design for proper location. Be sure to leave enough room that the pressure foot does not pinch the garment on the inner edge of the frame.
- Remove the frame from the machine. Place item to be sewn on the exposed backing. Smooth fabric on the adhesive backing. Place frame on the machine and embroider.
- Tear sewn items from the backing. This sometimes requires both hands. Patch the hole with another piece f backing and continue.
Fast Frames add-on frames will work with many different machines, when you upgrade or change machines, often all you need to get up and going again is a new exchange arm. – cleverly thought out